
Vue3.2以上でscript setupをつかったComposition APIの情報がなかなか少なかったので分かってることをまとめてみた。
ちなみに、だいぶ書きやすくなって使いやすい。可読性もバツグン。
Composition APIをつかう準備
ViteをつかってVueの環境をつくっていこう。
ちなみにVue CLIよりViteをつかったほうが早いからつかっているが、Vue CLIでもVue3.2以上にupdateすればOK。
// npm 7以上、ViteでVueを構築する場合
> npm init vite@latest something-app-name -- --template vue

Scaffolding project in D:\development\something-app-name...

Done. Now run:

  cd something-app-name
  npm install
  npm run dev

> cd something-app-name
something-app-name > npm i

added 32 packages, and audited 33 packages in 12s

4 packages are looking for funding
  run `npm fund` for details

found 0 vulnerabilities

something-app-name > npm run dev

  vite v2.7.13 dev server running at:

  > Local: http://localhost:3000/
  > Network: use `--host` to expose

  ready in 663ms
インストールが完了したらhttp://localhost:3000/へアクセスしてHelloWorldが表示されるか確認しておくこと。

コンポーネントのscriptには必ずsetupを書いておく。これで準備完了。
<script setup>
</script>
作成したコンポーネントを他のコンポーネントでつかうには
importするだけ。components: {}とか書かなくていい。
// AppButton.vue
import BaseButton from './components/BaseButton.vue'
templateで今まで通り読み込めばコンポーネントが反映される。
<!-- AppButton.vue -->

  <BaseButton />
methodsは"通常の関数"に
methods: {}はJavaScriptでつかってる関数または関数式でOK。
function someExample() {
  // Something process
}
const someExample = () => {
  // Something process
}
propsは"defineProps"に
props: {}はdefinePropsに変更。なにかimportする必要もなくシンプル。
// BaseExample.vue
defineProps({
  message: String
})
<!-- AppExample.vue -->
<template>
  <ExampleComponent message="some message" />
</template>
dataは"ref" or "reactive"に
data() {}はref, reactiveに変更。refとreactiveに明確なつかい分けはないが、refは単体でつかうもの。reactiveは複数オブジェクトがあるとき。でつかい分けている。
ref, reactiveどちらとも、()内に入っているデータから型を識別してくれる。
// AppUserCount.vue
import { reactive, ref } from '@vue/reactivity'

const count = ref(0)
const user = reactive({
  name: "saito",
  age: 22,
  birthday: "1999-01-01"
})
<!-- AppUserCount.vue -->

  {{ count }}
  {{ user.name }}
  {{ user.age }}
  {{ user.birthday }}
$emitは"defineEmits"に
$emitはdefineEmitsに変わる。defineEmitsにカスタムイベントを配列として格納。
// BaseButton.vue
const emit = defineEmits(["increment", "decrement"])
const emitをイベントに持っていき、それぞれのイベント名を書いていく。
<!-- BaseButton.vue --> <template> </template>
下記のようにApp側にカスタムイベントを挿入すればOK。
// AppClickButton.vue
import { ref } from '@vue/reactivity'
import BaseButton from './components/BaseButton.vue'

const count = ref(0)

const increment = () => count.value++
const decrement = () => count.value--
<!-- AppClickButton.vue -->

  <BaseButton @increment="increment()" @decrement="decrement()" />
  {{ count }}
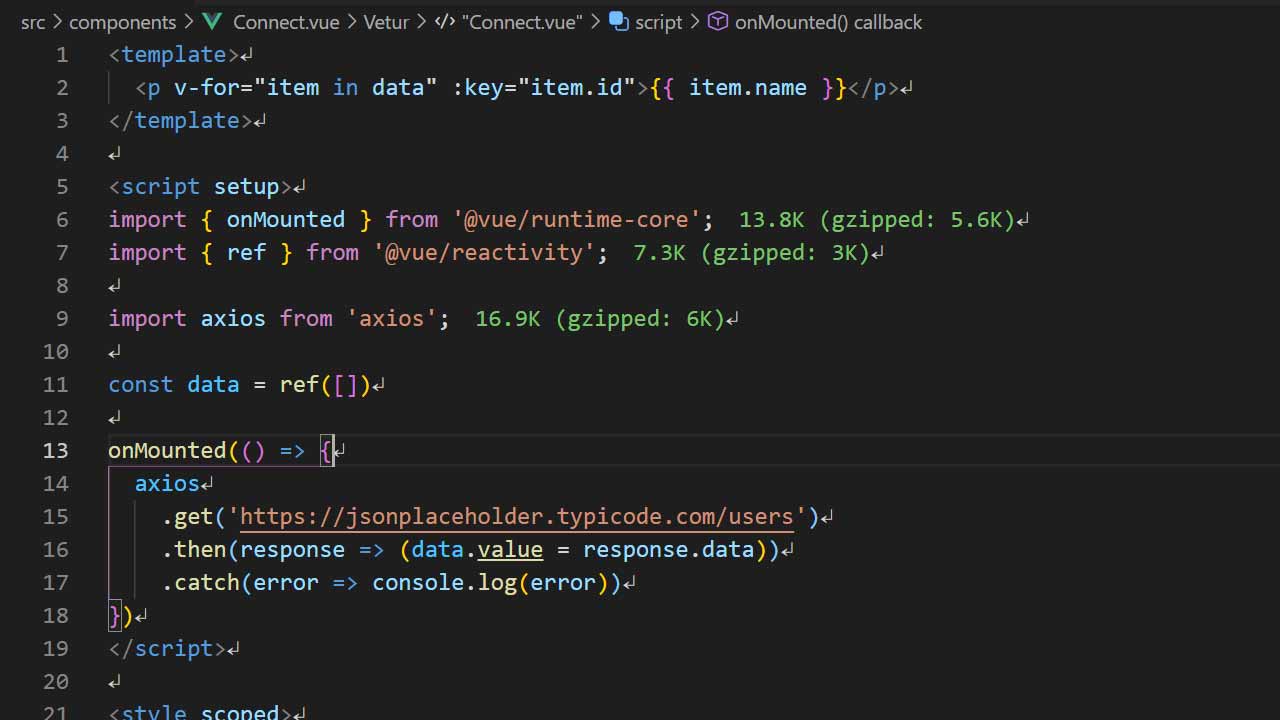
mountedは"onMounted"に
mounted() {}からonMounted()に変更。上記はaxiosをつかってJSONPlaceholderというサイトからデータを取得してマウントさせている。
import { onMounted } from '@vue/runtime-core'
import { ref } from '@vue/reactivity'
import axios from 'axios'

const results = ref([])

onMounted(() => {
  axios.get('https://jsonplaceholder.typicode.com/users')
    .then(response => results.value = response.data)
    .catch(error => console.log(error))
})
まとめ: script setupをつかってみよう。
今までのVueでの書きかたとはだいぶ違う部分もあるが、正直今回紹介した書きかたのほうがいいのは分かってもらえたかと。
script setupのおかげで今までよりシンプルに書けるようになった。開発がだいぶラクになるだろう。ぜひ使ってみてほしい。
現時点で自分が分かっていることは以上だが、新しいことが分かり次第追記していく。